When someone disputes your ownership of an image, or when you need to prove an image hasn't been tampered with, you need more than a verbal claim. You need verifiable, technical evidence. The most robust approach combines two complementary techniques: invisible watermarks and cryptographic hashes.
Understanding the Two Pillars
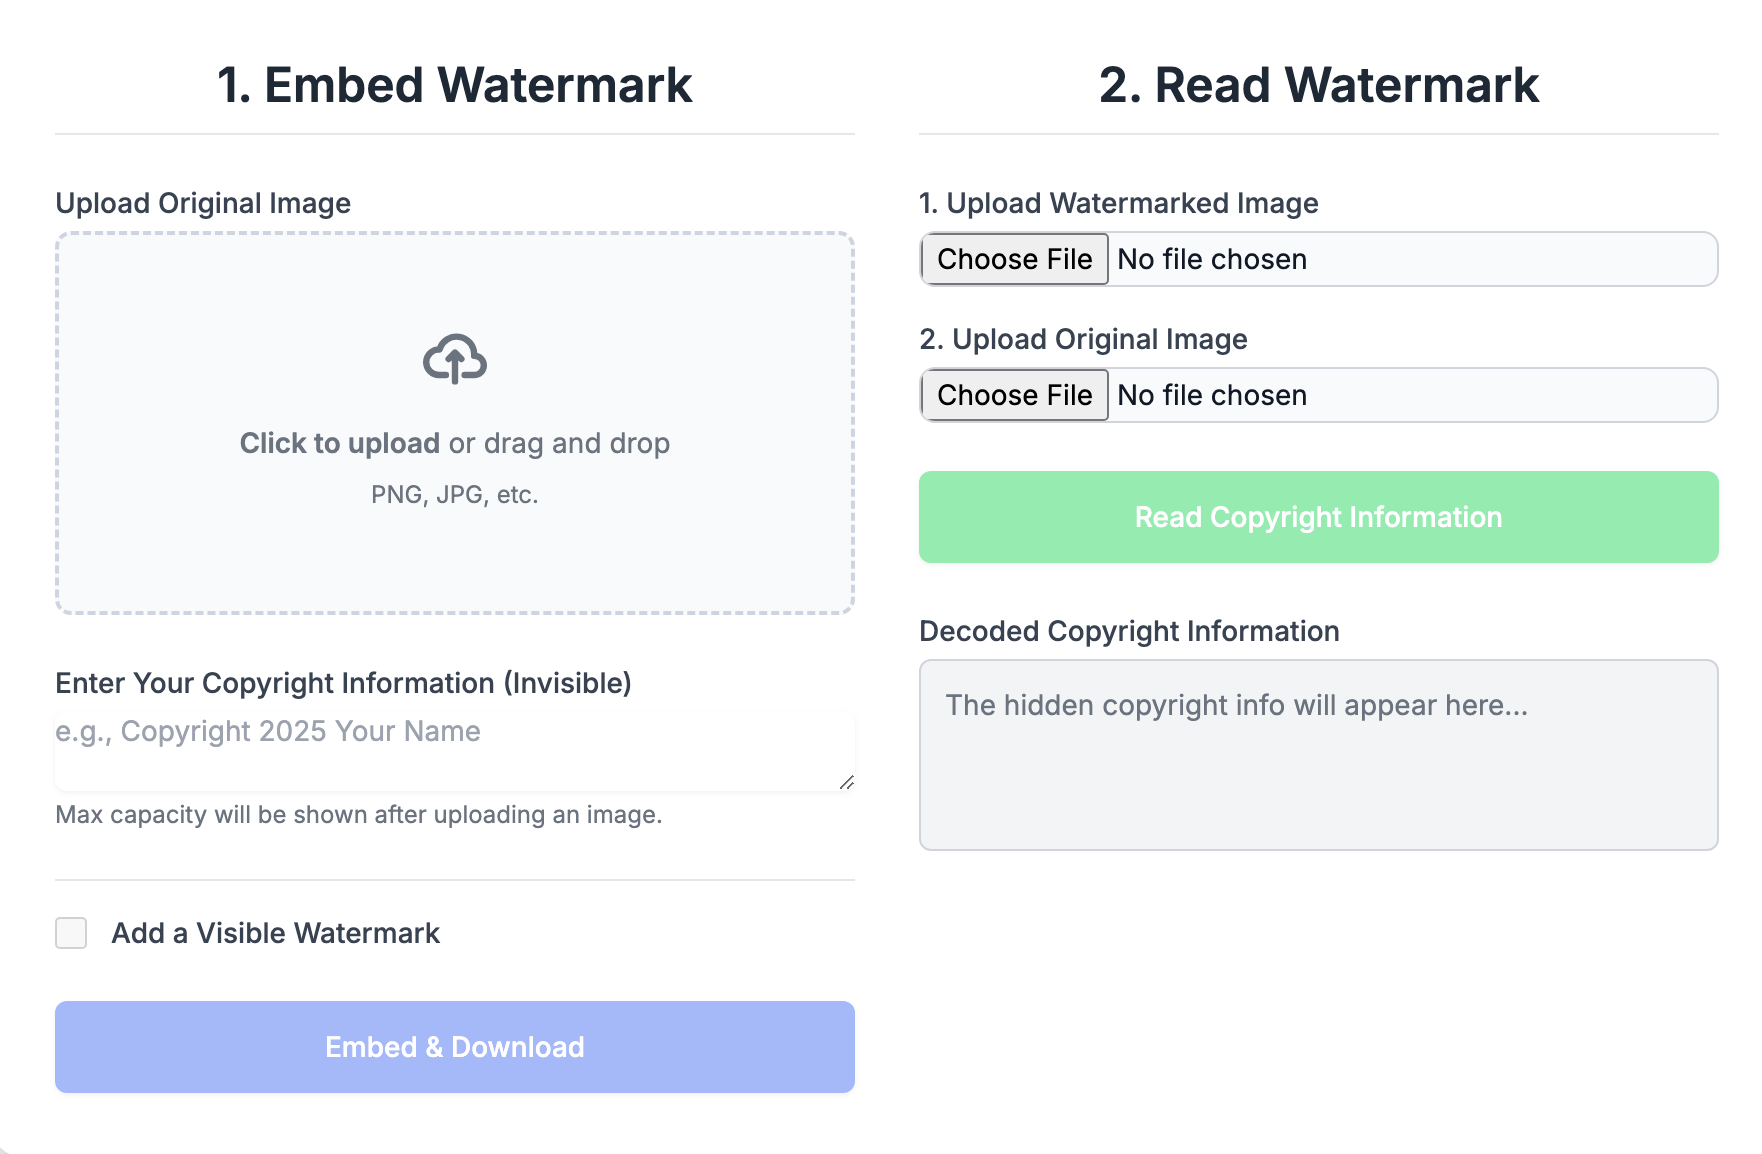
Invisible Watermarks: Your Embedded Signature
Invisible watermarks embed identifying information directly into the pixel data of an image. They're like signing the back of a painting—the signature isn't visible from the front, but it's there, part of the work itself.
Watermarks prove connection: they demonstrate that you had access to the image in a form that allowed you to embed data into it. Someone who merely downloaded your image cannot add a watermark that matches yours.
Cryptographic Hashes: Your Tamper-Proof Receipt
A cryptographic hash is a unique fingerprint for a file. Run any file through a hash algorithm like SHA-256, and you get a fixed-length string of characters. Change even a single bit of the file, and the hash changes completely.
Hashes prove integrity: they demonstrate that a file has not been modified since the hash was generated. They also establish a timeline—if you can show you had a hash of an image on a certain date, you had access to that exact file on that date.
"Watermarks say 'this is mine.' Hashes say 'this is exactly what I had, unchanged.' Together, they tell a complete ownership story."
Why Use Both?
Each technique has strengths that complement the other's weaknesses:
- Watermarks survive format conversion; hashes don't. If your image is converted from PNG to JPEG, the watermark may still be extractable, but the hash will be completely different.
- Hashes are mathematically verifiable; watermarks require specialized extraction. Anyone can verify a hash independently; watermark verification needs the right software.
- Watermarks can be embedded after the fact; hashes prove a specific moment in time. Someone could theoretically watermark an image they obtained from you; they can't retroactively create a hash that matches one you published earlier.
- Hashes catch any tampering; watermarks can survive minor edits. If someone color-corrects your image, the hash changes but the watermark might remain.
Building Your Authenticity System
Step 1: Create Your Original
Start with your finished, full-resolution image. This is your master file—the definitive version from which all others derive.
Step 2: Add Your Invisible Watermark
Embed your identifying information:
- Your name or organization
- Copyright notice with year
- Creation date
- Optional: contact information or unique identifier
Save this watermarked version as a lossless format (PNG) to preserve the watermark data.
Step 3: Generate Your Hash
Create a SHA-256 hash of your watermarked master file. This hash is now the unique fingerprint of your protected image.
A SHA-256 hash looks like this:
e3b0c44298fc1c149afbf4c8996fb92427ae41e4649b934ca495991b7852b855
This specific string can only be produced by this specific file. Any change to the file—any change at all—produces a completely different hash.
Step 4: Record Your Hash Publicly
The hash alone doesn't prove when it was created. To establish timeline, record your hash in a way that creates a timestamp:
- Email it to yourself. Email servers timestamp messages, creating a record.
- Post to social media. Tweet or post your hash with a description of the work.
- Use a timestamping service. Services like OriginStamp or OpenTimestamps create blockchain-verified timestamps.
- Register with a notary service. Some digital notary services accept hash submissions.
The goal is third-party verification of the date. You want proof that you had this hash—and therefore this exact file—on a specific date.
Step 5: Maintain Your Records
Create a verification package for each important image:
- Original unwatermarked file
- Watermarked master file
- Hash of the watermarked file
- Proof of hash timestamp (email, social post, etc.)
- Documentation of creation process
Store this package securely. You may never need it—but if a dispute arises, you'll be glad you have it.
Verification in Practice
When you need to prove ownership or authenticity, here's how the evidence works:
Proving You Created the Image
- Extract the invisible watermark from the disputed image, showing your embedded information.
- Present your timestamped hash, showing you had the exact file before the dispute.
- Demonstrate that the watermarked master file produces that exact hash.
- Show your original unwatermarked version (which only the creator would have).
Proving an Image Is Unmodified
- Generate a hash of the image in question.
- Compare it to your recorded hash.
- If they match exactly, the image is byte-for-byte identical to your original.
- If they differ, the image has been modified in some way.
Proving Timeline
- Present your timestamped hash record.
- Show that your current master file produces that exact hash.
- The timestamp proves you had this exact file on that date.
Limitations and Considerations
This system is strong but not perfect:
- Hash verification requires the exact file. If you only have a compressed version, or if the file was re-saved, hashes won't match your original—even if the image looks identical.
- Watermarks can be damaged. Aggressive editing, heavy compression, or deliberate attacks can destroy watermark data.
- Technical evidence still requires legal context. This system provides evidence, not automatic legal victory. Courts and platforms make final determinations.
- The original creator might not use this system. If someone steals your work before you implement protection, retroactive protection is limited.
A Complete Workflow
- Finish your image. Complete all editing before beginning protection.
- Save the original. Keep an unwatermarked version in your secure archive.
- Add invisible watermark. Embed your identifying information.
- Save as PNG. Preserve full quality and watermark integrity.
- Generate SHA-256 hash. Create the unique fingerprint.
- Timestamp the hash. Email it, post it, or use a timestamping service.
- Create verification package. Organize all files and documentation.
- Store securely. Back up to multiple locations.
- Export distribution versions. Create sized/compressed versions for sharing.
Hash GenCheck Pro
Generate SHA-256, MD5, and other cryptographic hashes for your files. Verify file integrity and create ownership records in your browser.